
Import

Add information to Alexandria from outside sources, such as MARC records, book vendors, or patron information from a central database. The Imports interface places everything you need to quickly find, modify, and run an import of patron, item, or image data.
Imports is found in Operations. Or to access it directly, add /import to the end of your Alexandria URL.

Import Video Playlist
COMING SOON

Related Tips

Contact Support

Import FAQs
This page contains the general information for setting up, saving, and running imports. For more detailed instructions, see the pages for the specific import types. You can also review the Complete Imports List at the bottom of this page.

Import Patrons

Import Items

Import Textbooks

Import Images
Welcome to Imports—let’s learn all you need to know!
First, let’s review best practices for running imports.
- We recommend that you schedule imports when Alexandria is not busy, because large imports can slow down your system. This also makes it easier to track down any problems later on, as it isolates activity during that time.
- Files should be smaller than 50 MB.
- The format of the file may be MARC, MicroLIF, or tab-delimited. In the case of tab-delimited, we recommend using Item Field Mapping. Otherwise, you’ll need to manually adjust it by clicking Field Mapping for each import.
- Create Saved Imports to save the settings you use most often, including Field Mapping.
Table of Contents
Navigation
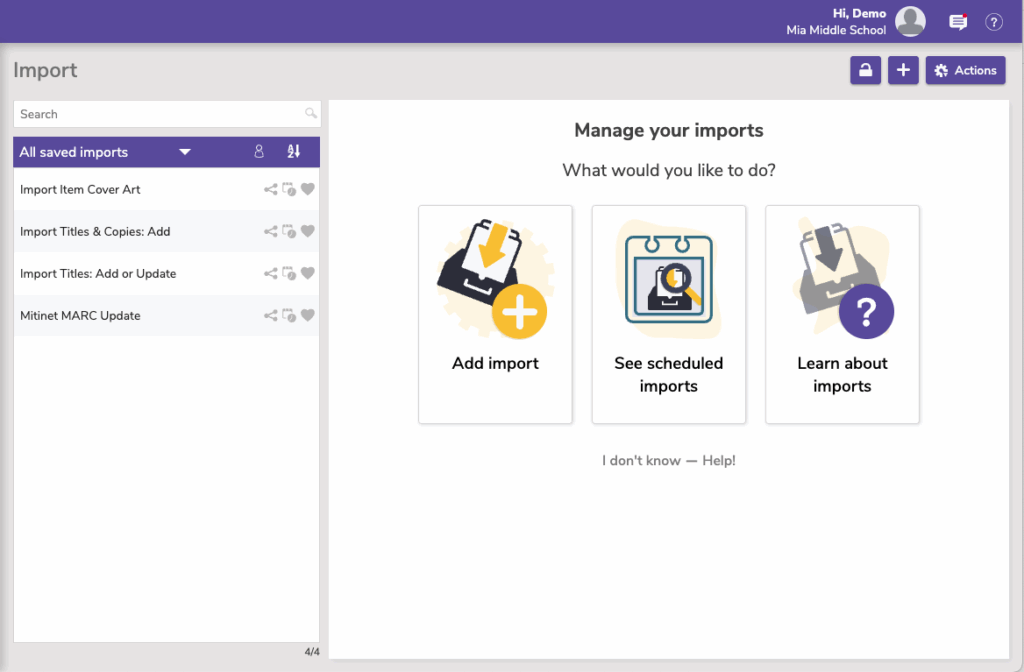
All saved imports
The column on the left shows imports that you (or others) have created and saved. Saved imports store the selection criteria that was used to create it, not the import file itself. However, you can set it up to import a specific file from your FTP server, allowing operators to schedule recurrent imports with minimal initial setup time.
A significant amount of time can be spent manually adding new patrons throughout the school year. Computer technicians and librarians often require time-saving procedures when it comes to importing patron (or item) information. Using saved imports, operators can automatically update your patron/item information using files from vendors and the SIS (School Information System).
Saved imports facilitate automatic data import functionality and allow operators to simply schedule recurrent imports; only requiring a small amount of initial setup time. Imagine new patrons added and existing patron records updated monthly, weekly, or even daily if required.
Changing the frequency of imports is quick and easy. There is no need to prepare reports or request downloadable import files from the office or technical support staff. Manual entry of students and new books has become a thing of the past.
Saved imports stores the selection criteria that was used to create the custom import. The results in the Saved Imports list reflect the import type selected and can be further refined by the settings tab.
Once a Saved import has been selected, it can then be performed, modified, duplicated, or removed.
Actions
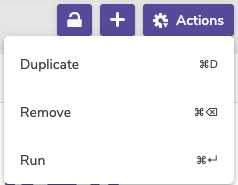
Duplicate an existing saved import using the actions menu.
Remove a saved import from the actions menu.
Run when you have completed all the set-up steps—and double-checked your work—you can initiate an import by pressing the button at the bottom.
Setting Up Imports
Imports are not an operation to be run lightly. Be sure that you understand the different settings and options for the import you are running. If you have any concerns, try running an import on a limited set of data (e.g. 5 patrons instead of 100), and remember you can always contact our support team!
Overview
Set up the generic information and behavior of this import when it runs.
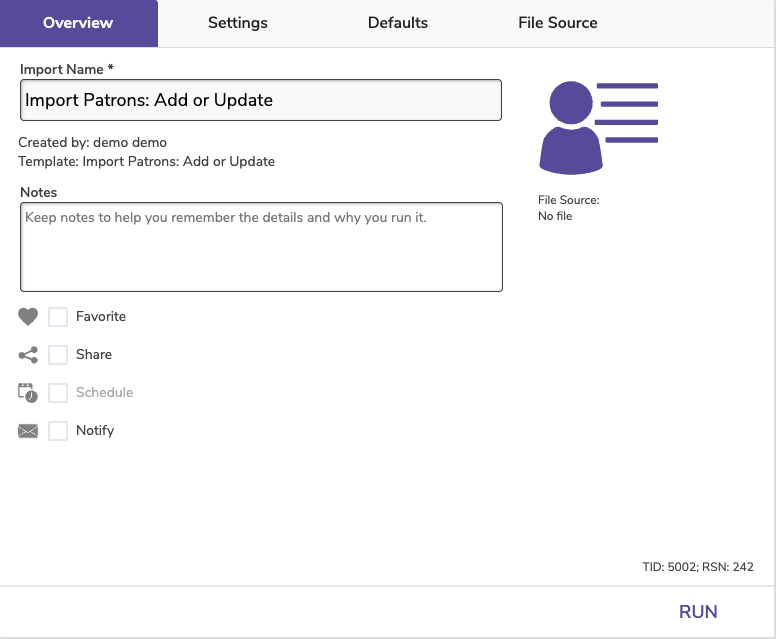
- Import Name. This shows in Operations Management so it’s helpful for this to be descriptive; you may even want to include your site name, or import purpose. For example, Item Import – EVE – Fix Call Numbers.
- Created by. Lets you see the operator who created the Saved import.
- Template. Since you can name your import whatever you want, this information tells you (or support staff) the original template used to create this saved import.
- Notes. Provide general usage notes about the import here.
- Favorite. Save this import to your favorites list for easy access.
- Schedule. Set imports to run in the future; this is only available for FTP imports. For instance, let’s say that you wanted to run a certain import every Friday at 5:00am. Using the Frequency drop-down menu, select Weekly; from the On drop-down menu, select Friday; finally, using the Around fields, enter 5 and AM. The scheduled time is the time the import is added to your Operations queue. Depending on how busy your queue is, the import may or may not be complete at that exact time.
- Notify. If you want confirmation that your imports are being performed at the indicated times and sent to the appropriate people, check the Enable Email Notification box and provide email addresses in the fields below. For example: johndoe@examplelibrary.com. Separate multiple email addresses with commas (for example: johndoe@examplelibrary.com, janedoe@examplelibrary.com).
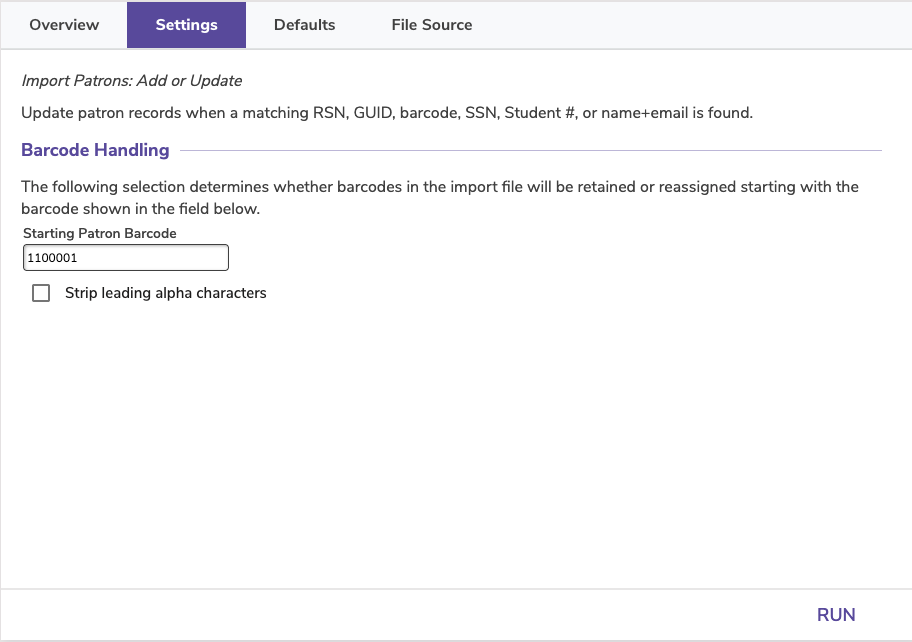
Settings
Settings vary significantly per type of import. See Import Items > Settings and Import Patron > Settings.
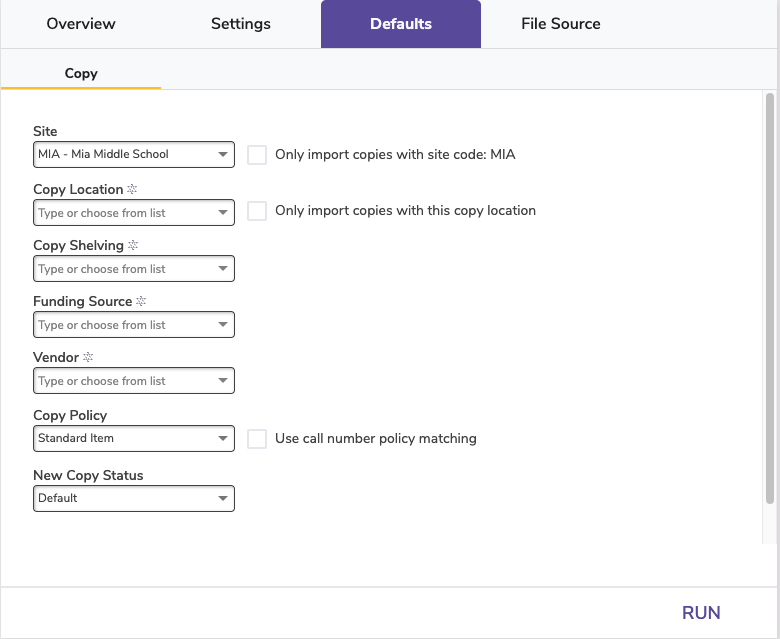
Defaults
Defaults vary significantly per type of import. Note that defaults are only used if the information is not included in the selected file–it will not overwrite already-specified data.
File Source
| Drag and drop Drag an import file from your computer and drop it on the File Source tab for a quick and easy import! |
When setting up a saved import, you must specify where the file is coming from. This is done in the File Source tab. Set the Protocol dropdown to either One-time file upload (and choose a file), FTP, or FTPS.

Skip first record. When checked, Alexandria will not import the first record in the import file; this is generally done when the initial record of your import file contains an unrecognized header or data column names. This setting is not necessary for recognized COMPanion headers, which will never be skipped so that they are properly imported.
Choose File
This option is fairly straightforward. You’ll choose a file from your computer that follows the requirements of that import (varies between patron, item, and image imports), and for patron/item imports you’ll set your field mapping (unless the file contains Alexandria headers).
FTP/FTPS
Alexandria can import new (or update existing) patrons from a record database stored on an FTP server. These options allow you to specify the (secure) FTP server URL and username/password credentials, and test your connection.
 | FTP, short for File Transfer Protocol, is a set of rules (language) used to transfer files between computers on a network, such as the internet. There are two computers involved in an FTP transfer: a server and a client. An FTP client is an application that allows you to upload, download, and otherwise manage files stored on the FTP server. There are several FTP clients available for free, such as FileZilla and Cyberduck. |
- Delete Files after Processing. When checked, the file will be removed (deleted) from the FTP directory after it has been successfully imported. If the file needs to be used by multiple applications or sites, don’t select this option.
- Host. Enter the host name or IP address of the FTP-accessible server. For example, myserveraddress.com. Don’t worry about including the URL protocol/scheme (e.g. ftp://); it will be automatically appended before the host name, depending on your Protocol selection (above).
- Port. By default, FTP runs over Port 21 and FTPS runs over Port 990.
- Path. Enter the full path, including filename and directories. For example, /directory/subdirectory/filename.txt. If you have multiple files, we recommend that you set up a saved import per file, but if your path leads to a folder that contains multiple files, Alexandria will attempt to import them all.
- Username and Password. Enter the username and password required for the server. If your FTP server is configured to allow it, you can connect anonymously without having to enter anything.
- This is a Shared Patron Import. (Option for patron imports on a Distributed Catalog) Only patrons with Site Code of THIS site will be imported. The file will be left on the server for processing by other sites.
- Field Mapping. Learn more about Field Mapping.
- Alexandria automatically recognizes file headers created by other COMPanion software to correctly import files without you knowing anything about the contents of the data. Field Mapping is required for all tab-delimited import files that do not have a header.
- Patrons and items are imported in sequential order. Use the arrows to correctly order the fields of the import file. Click the green checkmark on an individual field to exclude it from the import.
- See Import Field Mapping for more information.
 | If you use FTP, you can specify the folder in the path name (instead of the file name) and it will import all files in that folder. |
Use FTP and Saved Patron Imports as a Patron Server
It can be difficult for administrators to keep up with changing patron populations over a vast network of Alexandria instances, such as in a Distributed Catalog. With our shared import FTP functionality, an entire patron record database can be stored in one central location and every Alexandria instance—once configured—can import new (or update existing) patrons as they become available.
| To make it really easy to manage your patron databases, use one of our SIS Integrations to set up automatic and hands-free student imports! |
How Does This Work?
Most school districts use administrative software with centralized student information management; this software has the ability to export an entire student population, which can then be transferred from one host and stored on an FTP server over a TCP-based network.
Once the patron file has been transferred to a shared FTP server (and with the proper administrative permissions), patron data can then be imported or exported to any Alexandria instance.
 | If several sites import from a shared directory, it is absolutely essential to have your FTP settings accurately configured! For instance, if none of your sites except one has Delete Files After Processing checked, that school will cause the shared import file to be erased after import! One bad apple can essentially spoil the whole bunch. For this reason, we recommend that you consider having an IT professional configure your scheduled FTP imports and/or prohibit specific Import and Export settings for certain Security Groups. Further, if you’re using the FTP selection to schedule imports for files other than patron records (e.g. MARC record imports) we recommend that you create independently named subdirectories for each file type being imported. For example, your URL might be: ftp://myserveraddress.com/directory/subdirectory/. |
If you don’t specify a particular file to import, Alexandria will import every file it discovers in the shared FTP directory; even if multiple files exist in the directory—they will all be processed and imported separately. For example, if the URL you provide does not contain a specific file name (e.g. ftp://myserveraddress.com/directory/subdirectory/ ), then all files located within that directory are imported. However, if the URL you provide does include a file name (e.g. ftp://myserveraddress.com/directory/subdirectory/filename.txt ), then only the file that matches that name will be imported.
Once a file has been successfully imported, it will be left on the server for processing by other applications or sites unless you have the Delete Files After Processing option checked; then, the file will be removed (deleted) from the FTP directory.
So that you don’t import patrons/items from sites other than your own, only patron/item records that match your current Site Code will be imported. Additionally, if you have the This is a Shared Patron Import option checked, the program will only import new patron records; this is determined by matching internal Site Codes and checking filenames and file creation/modified dates.
| Read about Patron Imports Best Practices! |
COMPanion FTP Service
Access to COMPanion’s FTP server is included in SIS Integration packages. Contact our Sales Team if you’re interested in adding this service to your library!
File Transfer Protocol (FTP) is a standard network protocol used for the transfer of computer files between a client and server on a computer network. In other words, scheduling a patron import from an FTP server is another way to automatically update patron information in your library. Use it in conjunction with SchoolDay or Clever to update information that might not be included in those syncs. FTPS is similar, except your data is encrypted and secure.
With this service, you’ll be provided with a secure and private folder on COMPanion’s FTP server. You can then upload files to that folder and transfer them to Alexandria through a patron import.
| We only allow explicit FTPS transfers. Explicit FTPS is a newer transfer method that allows for more flexibility in determining how secure the file is. Before a transfer starts, the client requests encryption information to see which data is secured. However, implicit FTPS encrypts all data and establishes a secure connection before the transfer. |
FTP Onboarding
Want access to COMPanion’s FTP server? Here’s what you’ll need to do!
- If you don’t already have a SIS Integration package, contact our Sales Team to add one to your library.
- Call Customer Support and they will send you a link to set up a username and password.
- Once this has been completed, our Hosting Team will create a folder on our FTP server for you. We will send an email with a link to your folder.
- You’ll then need to work with your library or district tech to upload patron import files. Since we do not work directly with your SIS, this isn’t within our area of support. It will be up to you and your district to get the files in the correct format to your hosted folder. Check out Import Field Mapping and Import Tab-Delimited Records for information on Alexandria’s file formatting requirements.
- Once the file is in your folder, you can set up and schedule an FTP or FTPS import in Alexandria.
Complete Imports List
| Archive Before Import is no longer an option. Here’s why: In the past, we have suggested that users run an archive prior to importing a large set of data. This archive would act as a fallback solution in case anything went catastrophically wrong. However, Alexandria now runs daily archives as part of its normal operations, so as long as you follow our suggested Backup Procedures, you will have a backup from the day before. Why wouldn’t you want to use an Archive as a way to ‘undo’ a large import or utility? Because you might not be the only person working in Alexandria. Other librarians might be cataloging, patrons might be placing holds—all things that are hard to control and almost impossible to track down if you restore from an Archive and effectively erase all those transactions. We highly encourage you to run potentially dangerous operations, like imports, during low usage periods. Choose your import options scrupulously and review the log for errors immediately following the operation! |