Patrons Tabs
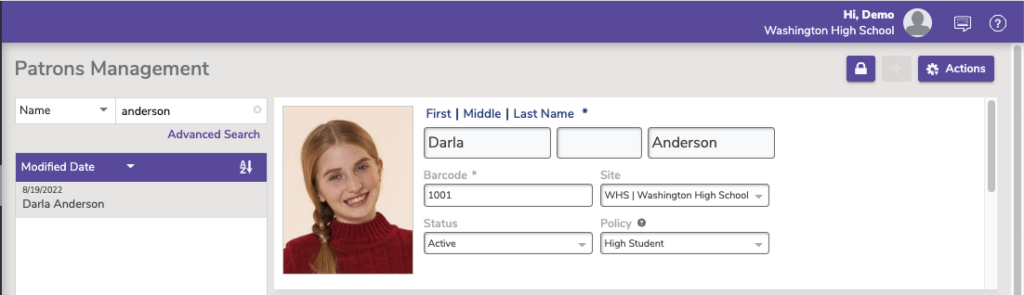
The right side of Patrons Management shows the current Patron record, which displays the patron picture, First, Middle, and Last Name, Barcode, Site, Status, and Policy. To the left of the current record is the records list (based on what you searched).
To make changes to the Patron record, unlock the record in the top right corner.
Patron Picture
 | Hover over the picture to access the buttons to take a patron picture using a connected webcam, – to remove, or + to upload a new picture. |
Name
First, Middle, and Last Name fields. Last name is a required field.
Barcode
Each patron and operator is assigned a unique barcode up to 15 characters long, based on the value set in Preferences > Patrons. You can change the assigned barcode here. Barcode is a required field. Learn more in Barcode Your Collection.
Site
Use this dropdown menu to choose the site or school that your patron attends. A list of valid and available sites will always be pulled from the data in your Sites Management. To ensure the accuracy of reports, be consistent when selecting this information. Reports can be generated and sorted by this field. For example, you may print an overdue list for all the students of a particular school.
Status
Use this dropdown menu to change the status of the current patron.
- Active. These patrons can use the library (check in and out) according to the rules of their assigned patron policies.
- Card Lost or Suspended. These statuses cause a warning message to appear when the patron barcode is entered in Circulation and require operator intervention in order to continue. See Patron Policies > Overdue for more information on suspending patrons.
- Transferred, Inactive, or Other. These options are used mainly for generating reports for patrons with a statuses other than Active; for example, those who have been removed via one of your SIS integrations will be assigned a status of ‘transferred’. These statuses cause an alert message to appear on the Circulation module when the patron barcode is entered. In ambiguous situations a patron note will be helpful as long as the patron’s privacy is kept in mind.
Policy
The policy that you assign to a patron or operator determines the library rules for their account. To choose a policy for a patron, click the Policy drop-down menu and select a value. The default policy for new patrons or operators is automatically assigned based upon your Default Policy setting in the Patron Defaults preferences. See Policies.
Records List
The left-hand side of the module contains the Patron Records List pane, where all patron and operator records matching your search criteria will be displayed in the sort order set at the top of the list.
Selecting a patron from the list will make that patron record current on the right.
The area situated above the record list contains tools that useful for adding, browsing, and finding patron or operator records.
- Quick Search. Which patrons do you want to view? Click here for a few simple, predefined search options.
- Most Recently Modified
- Most Recently Created
- Name
- Barcode
- Homeroom
- Advanced Search. Click to open the Advanced Search.
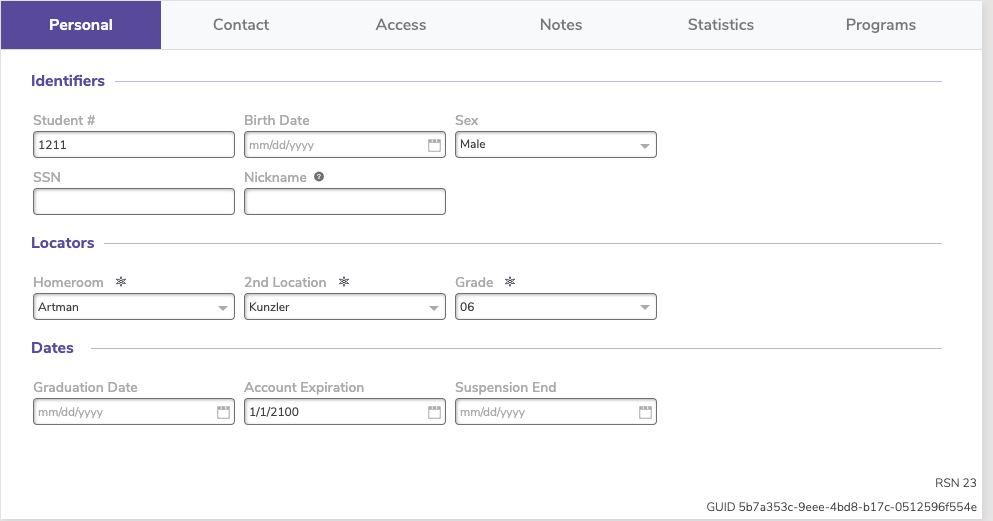
Personal
Student #
The community ID is designed to be used as an additional local for your local ID. This could be a student code, phone number, parcel number or any other unique identification code. You are allowed to customize the name of this [Community ID] field in the Terminology preferences.
Birth Date
Enter the patron’s birth date. This information is used solely for reference.
Sex
Use this drop-down menu to help identify the sex of this patron; Male, Female, or Unspecified. The default is Unspecified. (If you need to make a more specific note, use one of the Notes fields.)
SSN
In the United States, the “government ID” is typically the social security number (SSN); other countries may use other formats. The name of this [Government ID] field can be customized in Preferences > Setup > Terminology.
 | These are alternate, unique ID codes you may want to use with Alexandria. If you plan on updating patron information automatically from a central administration system (or you want to locate patrons by alternative codes,) enter data in these fields. Duplicate values are not allowed; if a duplicate code is entered, Alexandria will give you an error message, notifying you that you need to make your code unique. |
Nickname
Enter the patron’s nickname if they have one. This could be a shortened version of their first name or an entirely different name they prefer to go by. It will be displayed in parentheses after their first name in both Patrons Management and the Circulation Current Patron pane, and can be used to look up a patron record. Also, a patron’s nickname will be used in place of their first name in Researcher, Self-Service, Activity, Status, Labels, and all notices from the library (except receipts).
Homeroom
The location of a patron in a school is typically the student’s homeroom or first period class. To ensure the accuracy of reports generated and sorted by this field, be consistent when entering information. Use Tools > Authority Control to fix any discrepancies. For example, you may print an overdue list of all students in a homeroom with overdue items. You are allowed to customize the name of this field in the Terminologypreferences.
2nd Location
Use this field to group patrons by a second location or to track any other useful data. You can enter letters, numbers, as well as spaces in this field. Use Tools > Authority Control to fix any discrepancies. Therefore, to ensure the accuracy of reports, be consistent when entering information in this field. You could, for example, use this field to classify the ethnicity of patrons for government or internal reports. If desired, you are allowed to customize the name of this [sublocation] field in your Terminology preferences.
Grade
This field identifies the patron’s level in school. Alexandria will advance patrons by one level after the last day of school if the level is set to either “JK” (junior/kindergarten), “PS” (pre-school), “K” (kindergarten), or “1-12“. Patrons automatically graduate to the next grade level on the date you enter as the last day of school on the Library Information preference window. Graduated patrons are given the grade level of “Graduated”.
- This term can be customized by the librarian (see Terminology Preferences).
Graduation Date
Enter the date that the patron will graduate. You are allowed to customize the name of this [Optional Date] field in the Terminology preferences.
Account Expiration
Enter the date that the patron’s account expires. If you leave this field blank, Alexandria will calculate the expiration date based on the patron’s policy when the patron record is first added to the system. For example, if a Patron Policy in Preferences is set for 365 days, the account will expire 365 days from the date the patron was entered. When a patron’s account expires, their status will be changed to Inactive during Alexandria maintenance.
Suspension End
If the patron Status is set to Suspended and a date is entered in this field, the suspension will expire on that date. The field appears grayed out if the patron’s status is not set to Suspended.
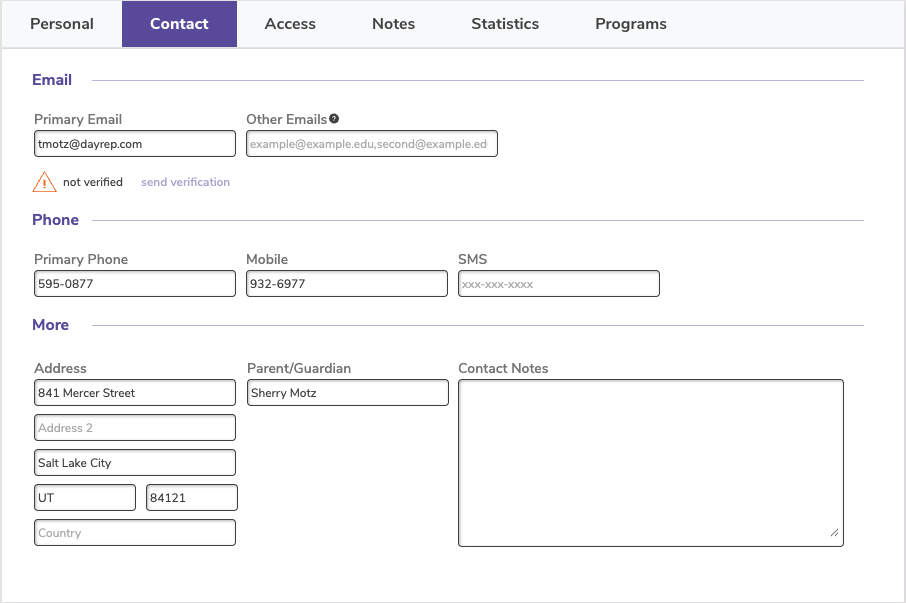
Contact
The Contact tab identifies contact information for the patron, including the parent or guardian you need to contact in case of emergency.
Primary Email
Enter the patron’s primary email address. This is the email used for email notifications (like overdue notices), resetting passwords, and syncing patron information to your SIS. To guarantee that email notifications are being sent, check the Enable Automatic Email Notifications box in your Circulation Settings preferences.
Click send verification to send a link to the listed email to verify email address. This should be done for every operator in Alexandria, and can be done for all patrons as well. A verified email address will ensure patrons are receiving notifications and can reset their passwords, if needed.
Note: for Adding Operators, high level operators are required to enter an email.
| Email Preferences must be properly configured for emails to go out. |
Other Emails
Enter up to five additional emails, separated by commas.
Primary Phone
Primary phone number. This is the number that will show on select reports.
Mobile
Mobile phone number
SMS
Number for SMS/ text messages, which will be available in a future update.
Address
Street, city, state, zip code, and country
Parent/Guardian
Patron parent/guardian name (these terms are customizable in terminology preferences). This is used when you choose to address reports to the parent/guardian.
Contact Notes
Use this field to enter notes on how to contact this patron or the patron’s legal guardians. You can also use the Contact Notes field to track names, additional phone numbers, and email addresses.
 | Learn more about setting up email notices for patrons and librarians. Patron contact information can be viewed and changed by patrons in the Researcher interfaces, if your security preferences allow. |
Access
The Access tab contains a patron’s Security Group and Site Access in addition to their username and password.
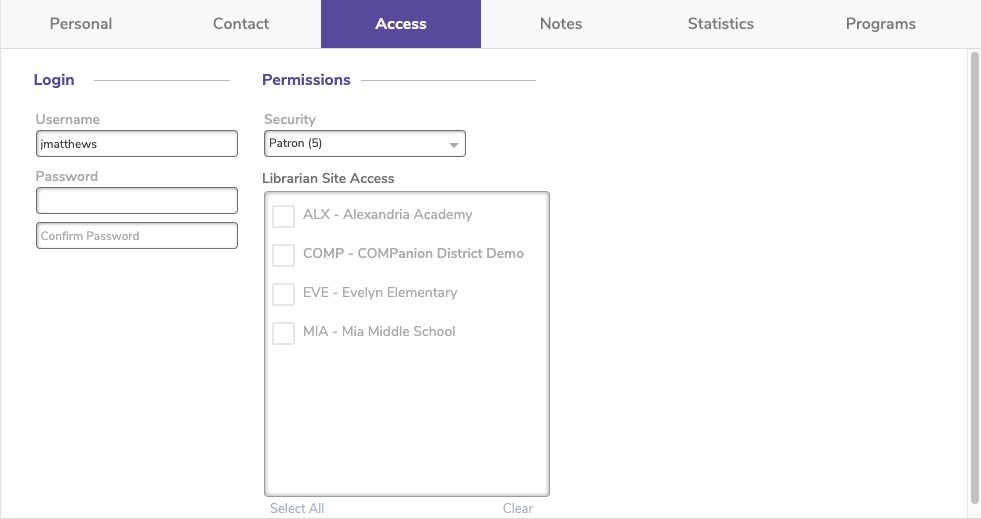
Username
Provide the username that allows operators to log into the Alexandria Librarian securely and your patrons to access the Researcher interfaces and place holds, reservations, and check their status and details.
Password/Confirm Password
Here is where you create, confirm, and change mandatory patron passwords. If you don’t provide one at the time of creation, the password will default to the patron’s Last Name without spaces or punctuation. Patrons with special characters or accents in their last name will be prompted to create a new password when logging in, as diacritical letters are not supported in the password field. For security reasons, passwords are never shown anywhere in Alexandria.
| When set, patron passwords must meet the following requirements according to the Password Strength setting of their Security group: Weak: At least 6 characters. Regular: At least 8 characters, including at least one letter (a-z) and one number (0-9). Strong: At least 10 characters, including at least one letter (a-z), one number (0-9), and one symbol (!@#$%^&*-=+.,). Passwords are not case sensitive. |
Patrons sharing emails
There are some cases where patrons share a primary email (e.g. a parent’s email). When a password is reset, a separate password reset email will be sent to every patron record that shares that primary email.
Security
This is the security level assigned to this patron or operator; a user’s access level determines what operations they are allowed to perform. Security Groups can be created, removed, or adjusted in Security.
Librarian Site Access
Check (or uncheck) any sites that the operator is permitted to access. This list of valid and available sites will always be pulled from Sites Management.
Notes
The Notes tab can be used to include additional information about the patron. If any notes are attached to a patron record, you can view them by clicking Notes in the action menu of the Current Patron pane of Circulation. Notes are meant for operator use and can only be seen here and in Circulation. They are also included in some reports.
These comments can only be viewed from the Circulation module.
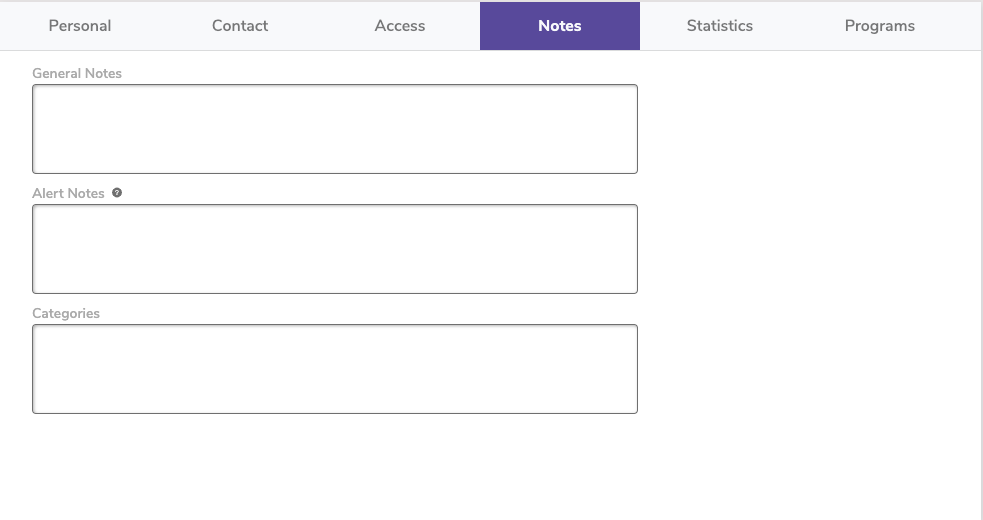
General Notes
This field can be used to attach additional comments about a patron.
Alert Notes
This field is used to make the librarian aware of special circumstances regarding a patron.
For example, you can create an alert note so that you may “pass along” certain information to the patron the very next time they use the library. The alert message will automatically appear on the Circulation module when you enter the patron’s barcode number.
Categories
Enter information about groups the patron belongs to; for example, special reading programs, at-risk students, special education students, gifted students, library contest students, or any other groups that you find useful. These category entries can be used to select patron records for reports.
Statistics
The Statistics tab contains historical information about your patron’s recorded library usage. This data is automatically generated by Alexandria and cannot be modified.
At the bottom of the window, click View History Report to download a PDF of the patron’s complete transaction history. This is the same as running a Patron History report.
 | Statistics are shown for both Library and Textbook data when applicable. Some statistics, such as Last Use, only apply for Library transactions. |
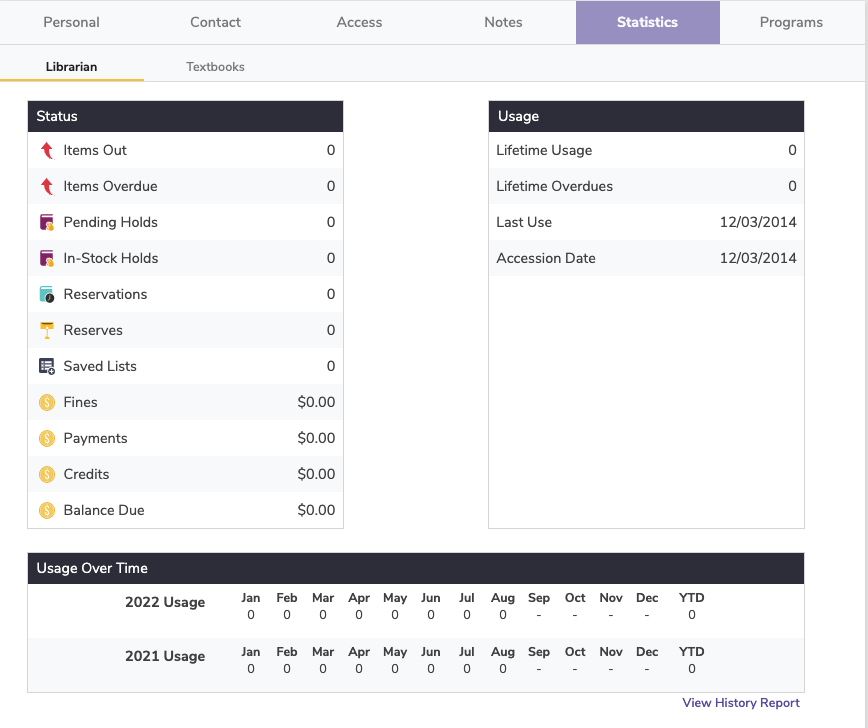
Click the different areas of data to learn more.
Programs
The Programs tab contains two subtabs: Study Programs and Lexile.
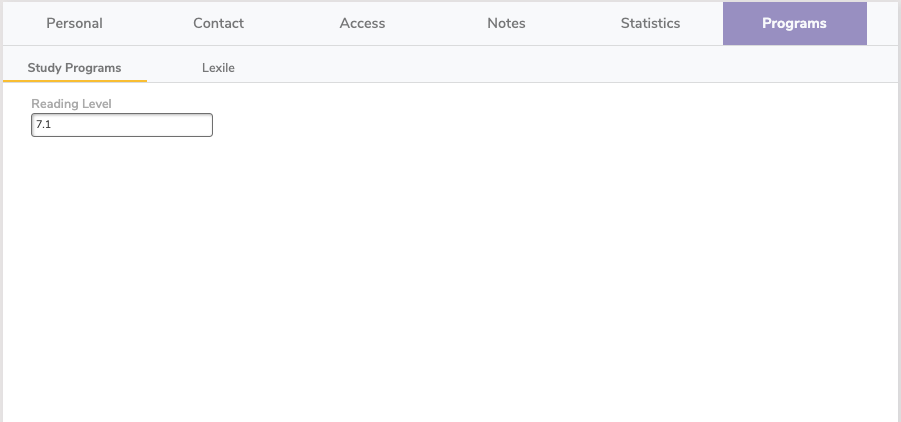
Study Programs subtab
Reading Level
Any reading level-related information you provide in this field will appear in the Current Patron Pane of the Circulation module when a patron is made current. It is commonly used as a quick reference for library staff to determine if an item’s readability is compatible with your patron. If the term Reading Level is not specific enough for your needs, you can customize this terminology in the Terminology preferences (e.g. Fountas and Pinnell or Accelerated Reader).
- If your account does not wish to use this field to store reading level information, it can be repurposed and used to store other information such as whether your patrons have accepted your AUP (acceptable usage policy); in this case, you would provide the appropriate information in the field (e.g. “Accept”/“Decline”, “Yes”/“No”, “Agree”/“Disagree”, etc.).
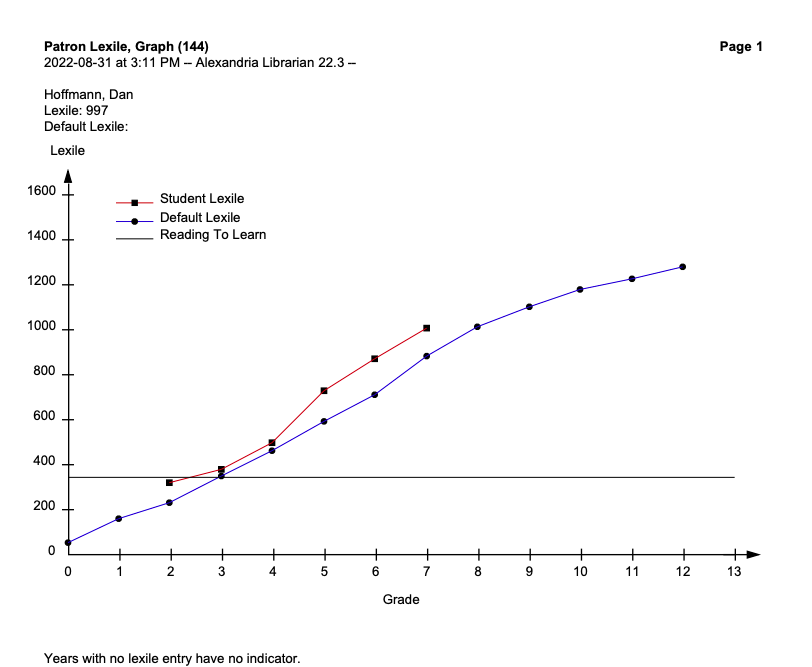
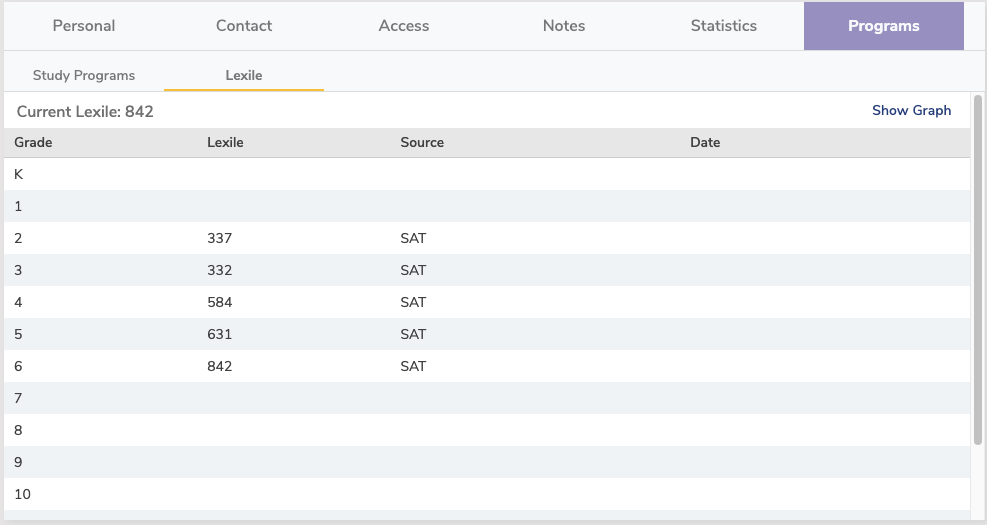
Lexile subtab
Here you will find the patron’s Lexile table. See Patron Lexiles for more information. Click Show Graph to see a graph of the student’s Lexile levels.