
Site vs. Location
Alexandria has multiple ways to indicate “where” a patron or copy is associated with. The two main types are what we call sites and locations. The typical Alexandria setup assumes you are separating copies and patrons by sites, and may or may not be using locations for further designation. However, in some cases, it may make more sense to operate with a single site.
Which setup will work best for you? Here are some things you should consider before making a decision.
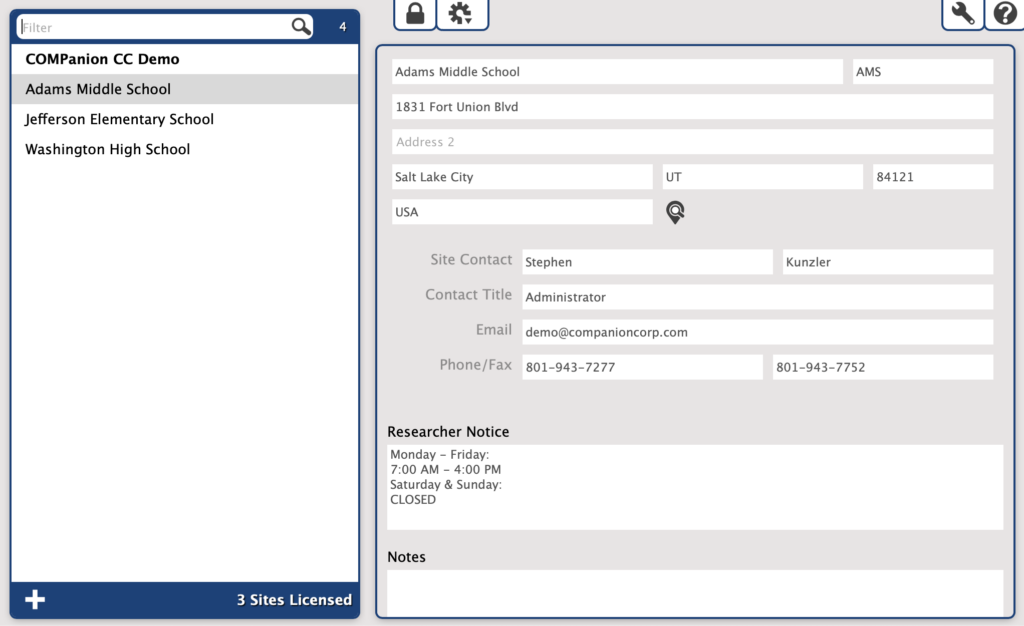
Sites are typically physical locations that separate your collection; usually these are individual schools in a district that wants its collection in a Centralized Catalog. The sites you’re licensed for can be viewed and modified in Sites Management. Each site’s record includes…
- a site code—a short, unique identifier that can quickly be used to identify your site,
- your site’s address and notes that can appear in Researcher,
- and the email address associated with the site (the “from” address for emails sent to patrons of this site).
Patrons belong to a single site, although they can have operator access to multiple sites. Titles (and usually e-resources) are not associated with a single site, but their copies belong to a single site. The site a patron or copy belongs to is important in the site preferences you have set for, say circulation rules, emails, and more.

Locations are a further distinction of a patron or copy’s physical location within their site. The terms for those primary and secondary locations can be customized in Terminology Preferences. Typically, the patron primary location is Homeroom for schools. But with resource centers, your locations would probably be school names. No circulation rules or policies are associated with locations.
*Keep location names consistent by using Authority Control.
Physical Location
Sites are for physically separate buildings and addresses. Because of this, sites give you some extra features to deal with interlibrary loans. This includes an In-Transit status for transporting items to another building when necessary.
But if you are operating at a single physical location, using sites can be extra work for you. For instance, if you bookdrop a copy from a “different” site (if you are logged in at WHS and the copy belongs to AMS), Alexandria will put the copy in transit and you will need to bookdrop it while logged into the correct site to make it available again. Unless your site needs this kind of accountability, you’d want to use locations instead.
 | Resource Centers A single resource center that serves multiple schools or districts could use locations. Although it does matter where patrons are because of delivery, all items are stored in the same physical place. Use a combination of locations and policies to separate patrons. You can also use policies to separate items if they need specific permissions or restrictions. |
Degrees of Separation
Sites
With sites, you have one more degree of separation.
- Copy Example: Site “Adams Middle School” > Copy Location “Special Collection” > Shelving Location “Back shelf” > Call Number “SPE ART”
- Patron Example: Site “Adams Middle School” > Location “Griffith” > 2nd Location “Jones”
Locations (homerooms) show in Circulation by site. So if you’re working at Adams Middle School, you’ll only see the homerooms for that school.
Locations
Typically, locations are homerooms. However, if you aren’t using sites, but your patrons are at different sites, you may need the Location field for that. In which case, you might put Homeroom under 2nd Location.
- Patron Example: Location “James Middle School” > 2nd Location “Griffith”
If you only have one site, you cannot separate locations. Consequently, they will all show under that one site.
Researcher
Researcher can be split by sites, but not locations.
| Sites | Locations (One Site) |
|---|---|
| Separate initial search results (if you, for example, want elementary school students to not see high school materials). Even with multiple sites, patrons could choose to search all sites if Show Site Selection is turned on in your Search and Explore Preferences. | Everything shows up in the same search results.You can still limit what patrons can check out through policies. |
| Each site has a Researcher hub (landing page) that can link to other pages. | There’s one Researcher hub (landing page) that can link to other pages. |
| Each site has its own details (for information like addresses and hours). | There’s one details section (for information like addresses and hours). |
Patrons/Items
| Sites | Locations (One Site) |
|---|---|
| Patrons can be restricted to checking out items by site. | Patrons can be restricted to checking out items by policy, but not location. |
| Search by site or location in Items Management. | Search by location in Items Management. |
| Restrict editing copies by site. | Anyone—with proper security—can edit any copy. |
| View subsets of copies by site in Items Management (if there’s a difference between copies in where they are or who has edit access, using sites makes it easier). | |
| Maps, which show patrons where to find items, can be made per site. | A separate title would have to be created to offer different maps for the same item. |
Preferences
| Sites | Locations (One Site) |
|---|---|
| Some preferences are site-specific while others apply to the whole system. This means preferences relating to circulation rules, record defaults, Researcher, and more can be different per site. See the Centralized Catalog page for a full list of site vs. system preferences. | All preferences and messaging apply to the one site. |
| Security is tied to sites, meaning you can designate which sites each operator can access (to view or edit data). | Operators given access to view or edit items, patrons, and site preferences will be able to do so for every location. However, security relating to site and system preferences is still separate, so you can give one type of operator access to one while giving another type of operator access to both. |
Reports/Utilities
Most reports and utilities have selections for both site and location. And you can print locations on labels, just like site.
| Still not sure which you should choose? Contact Customer Support to go over your setup options. |
Using Copy Location & Copy Shelving
When your physical collection is separated by call number, you can use maps to point patrons to the right place in your library. But what about when the call number doesn’t indicate the location, or the book has been put in a special spot temporarily? Using the Copy Location and Copy Shelving fields allow you to include additional information for specific copies. As an added bonus, patrons can filter search results in Researcher with Copy Location!
Uses for Copy Location and Copy Shelving
- Even if your account only has one site, you might still have your collection stored in separate rooms or even buildings! Assign a Copy Location to help users pinpoint where the item they are looking for resides.
- Equipment like projectors or chrome books often have to fit wherever you have space, which means things can get separated. Use Copy Shelving to add some extra context, so teachers know where to look for those pesky power chords.
- Call numbers are for every day use, but what if it’s Dinosaur month, and all of your dinosaur books are on a special display? Use the Change Copy Location and/or Change Copy Shelving utilities to let patrons know where the new temporary location is, and clear it all back out again at the end of the month when the dinosaur books are back in their usual spot.
In Search
After an initial search, patrons can select the filter option, then use Copy Location to narrow the results to their specific location (copy location is specifically looking at 852_b MARC tag).
Note the number at the end of Copy Location’s line. The ‘1’ tells you that one title in your search result has a Copy Location. If none of the results use Copy Location, the filter will not have a number next to it.
Additionally, patrons can find both Copy Location and Copy Shelving information in the Copy List of an item’s details.
In Circulation
Did you know Copy Location and Copy Shelving information appear in the Copy List dialog for copies that are at your site?
Now you don’t have to worry that you told a patron to look in the wrong place for the last remaining copy of the book!
Customization
Did you know that Copy Location and Copy Shelving are both terms you can customize? Simply go to Preferences > Setup > Terminology and change either field to something that makes more sense for your library system. Are you using Copy Shelving to hold instructions on where the electronic accessories like mice and power cords are located? Change the term to Electronic Parts Location. Using Copy Location for all your displays around the library? Maybe Display Location is a better fit. The sky is the limit!
And don’t worry–when you rename the fields, it will change all across Alexandria. Now you’ll be using a Change Display Location utility instead of Change Copy Location!