
Researcher how-to: create explore panes of saved lists
September 22, 2025
Miss Honey wants to help teachers create saved lists in Researcher with books their students can choose from for class reading. Let’s walk through how she (and you!) can create saved lists, then make them into explore panes so they are easy for students to find!
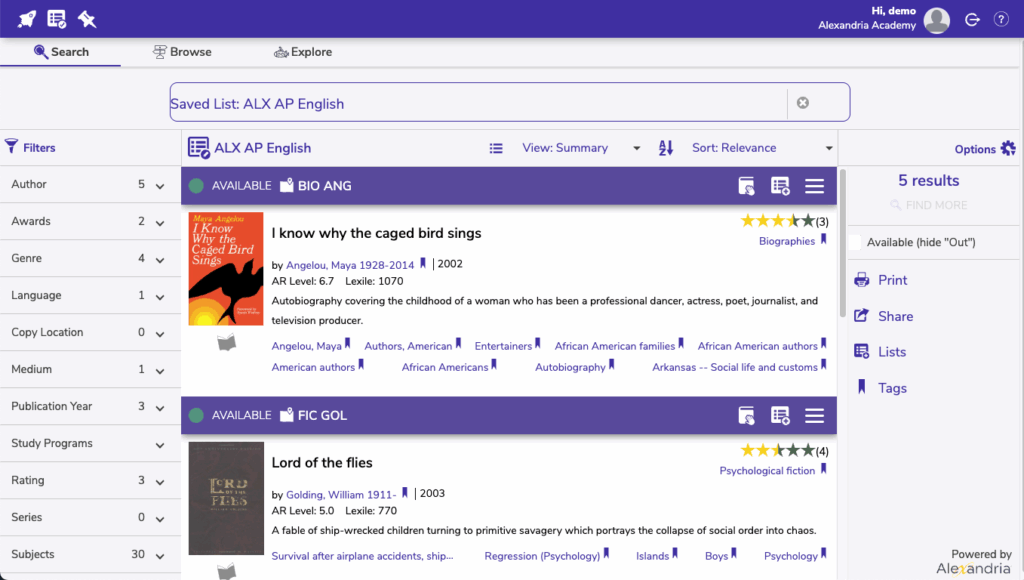
First, you will need to create a saved list. To create the list:
- Log in to Researcher to make a new saved list.
- Select Create saved list from either the lists menu in the topnav, the lists menu on the right (under Options), or the list menu available on each item in your results.
- Fill out the following information:
- List Name. Enter a name for your new list. It does not have to be unique.
- Sharing. Ensure your saved list is set to Public or Searchable
- When you’ve finished providing the name and access for your new list, click Save.
- Add items to your saved list by selecting one or more items from the Results List and click the Lists icon to the right under Options or from the Topnav.
- You can then Add All… or Add Selected… titles to the list of your choice.
 | You can now also reorder your list by using the edit list menu next to the list name! |
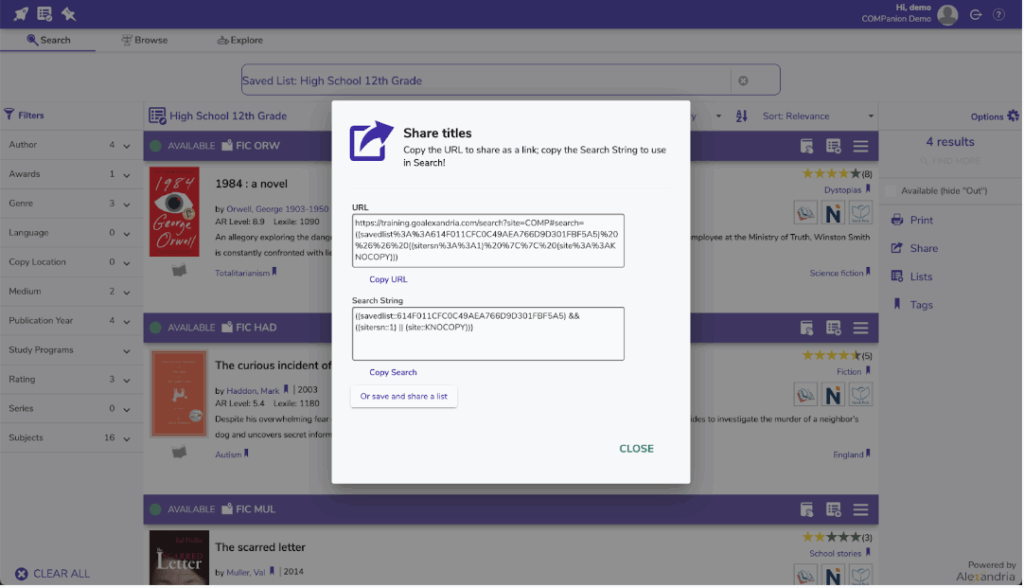
With the list created, we can now share the list to get the search string.
- Log in to your account and find the list you want to share.
- Lists must be Public or Searchable in order to share; you may need to Edit your list and change the Sharing options.
- To the right under Options, click Share. Just like with regular search results, this opens a Share window where you can copy the search string.
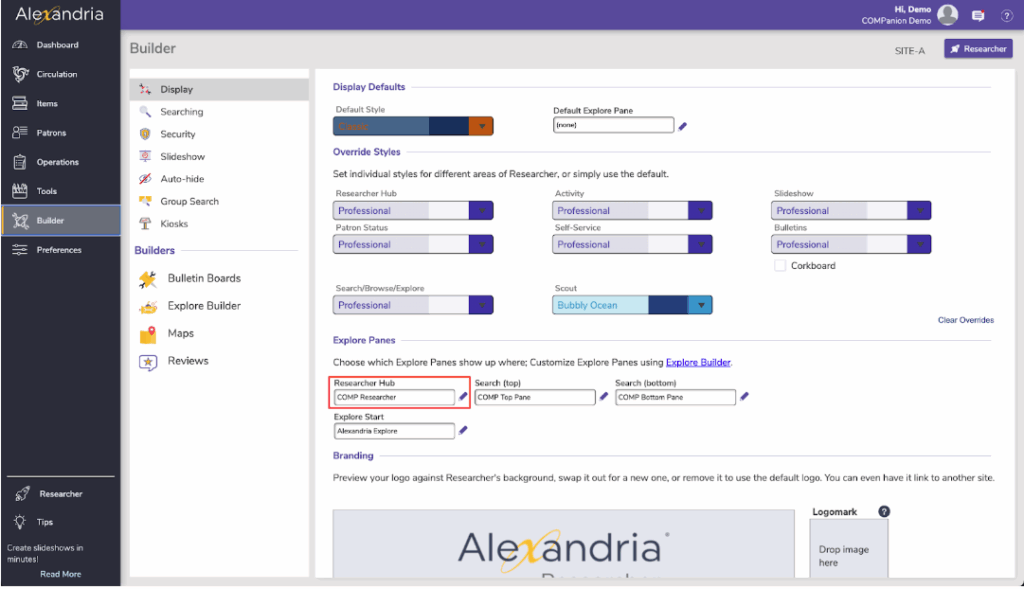
Lastly, you will need to create your explore pane.
- From Builder, go to Explore Builder, or go directly to /explorebuilder.
- In Explore Builder, click the Add Pane button located near the bottom of the Panes List; this creates a blank Explore pane, which allows you to customize and configure individualized Explore panes, buttons, icons, and actions.
- Or, select an existing pane you want to use as a template, and select the Actions menu > Duplicate Pane.
- In the new Explore Pane, select one of the blank (or occupied) buttons.
- Once a button is highlighted, give it a Label.
- You can add icons by dragging-and-dropping images directly onto blank (or occupied) buttons—either directly from your operating system desktop or from the Copy From Pane dialog. We recommend SVG (scalable vector graphics); otherwise, make sure that your icons (GIF, BMP, PNG, JPG)are no larger than 90×90 pixels.
- From the Action dropdown menu, select the desired action (Perform Search), and add in the search string you created from your saved list.
- Click Save in the upper-right corner of the window.
Bonus: Want to set your new explore pane as your main Researcher hub? Go to Builder > Display > Researcher Hub to select your new pane. Make sure to save your changes!
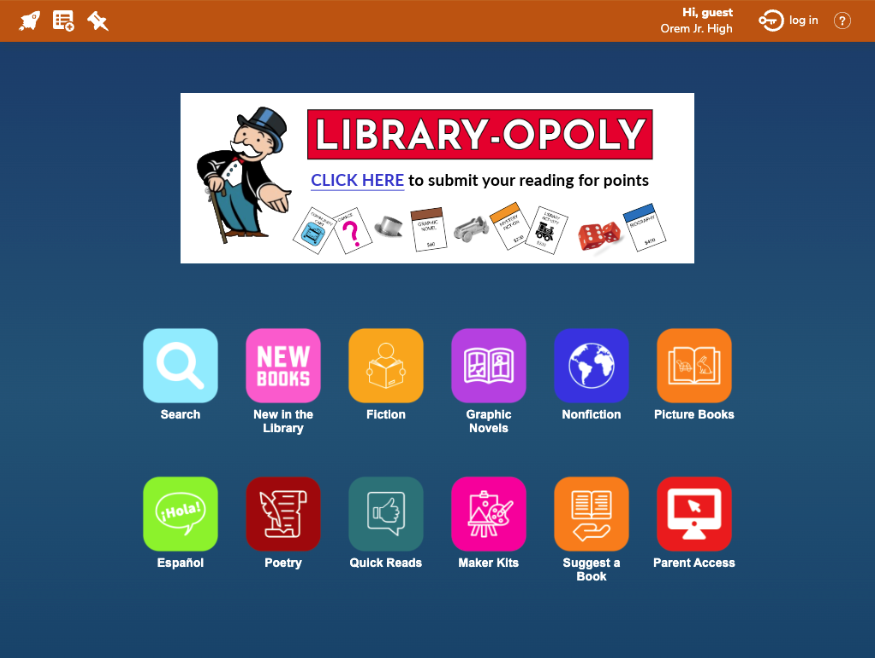
Special thanks to librarian Alisa Ellingson at Orem Junior High for this fun Library-Opoly idea!
Have you hear about our exciting new add-on, Goals?
Goals is a new module for librarians to define reading goals that students can sign up to. Create custom goals to encourage students to read (for example) 10 approved books over the summer, or maybe 50 books the entire school year! Students can see their goals and sign up in Patron Status. When a goal is complete, students can earn rewards (gems and badges).
Goals is an optional add-on; contact us to learn more.
 | We want to hear from YOU about your experience using the Alexandria support center. Take our survey to help us keep improving your user experience. |
0 Comments